Translate

Tuesday, October 16, 2012

Crochet Pink Ribbon Pattern


Crochet Pink Ribbon
Written by Adrena Donnelly 2012
a.k.a. Crochet Crazy Mama

Size: One Size (Approximately 2 3/4 inches long)

What You'll Need:
*Size H Crochet Hook
*Small amounts of 4-Ply worsted weight yarn in Light pink and Dark pink.
*Small Pink Button (I used heart shaped buttons)
*Saftey Pin (If you are making a pin)
*Key Ring (If you are making a Key Chain)
*Yarn Darner/Needle
*Scissors

Skill Level: Beginner/Easy

Abbreviations:
Ch=Chain
HDC=Half Double Crochet
SC=Single Crochet
St(s)=Stitch(es)
SlSt=Slip Stitch


Foundation: With Light Pink, Ch 22.

Round 1: HDC into the second Ch from the hook, and in each remaining Ch across.

Round 2: With Dark Pink, attach new color by pulling one strand of new color through the last HDC on the previous row. Ch up 1 and turn. SC in the next 20 Sts. 3 SC in the next St. Working on the opposite side of the Ch, SC in the next 20 Sts. 3 SC in the last St. Join with a SlSt to the first SC. End off and weave in yarn tail. 

Fold the yarn so that the lighter pink is to the front and the darker pink to the back. Then take one side and cross it over the front of the other. Using a yarn darner/needle sew the center of the ribbon securely at it's crossing point. Then sew on a small pink button at the crossing point on the front side of the ribbon. The ribbon is complete.

To use the ribbon as a pin simply place a safety pin on the back side of the ribbon and pin onto clothing, hats, or other accessories. To use the ribbon as a key chain, slide a key ring through the top loops of the ribbon.

Lastly, wear or show off your ribbon for breast cancer awareness to show your support for the cause! :)

***Terms of use: You may do whatever you wish with the finished product made from this pattern. If you do plan to sell the item, I ask that you give credit to where you got the pattern from. You can NOT claim the pattern as your own. You may NOT sell the pattern itself.

Monday, October 15, 2012

Sleepy Bunny Lovey Pattern


Sleepy Bunny Lovey
Written by Adrena Donnelly 2012
a.k.a. Crochet Crazy Mama

Size: One Size (Star measures 20 inches across)

What You Need:
*Size H Crochet Hook
*Soft 4-ply yarn in 3 main colors of your choice(1 skein each), labeled A, B, and C. You will also need White for bunny head, small amount of pink for ears and nose/mouth, and a very small amount of Black for the eyes. (I used Caron Simply Soft Yarn)
*Poly-fil for stuffing
*Ribbon (For optional embellishment)
*Yarn Darner/Needle
*Scissors

Skill Level: Easy

Abbreviations:
Ch=Chain
DC=Double Crochet
SC=Single Crochet
HDC=Half Double Crochet
HDC Dec=Half Double Crochet Decrease
SlSt=Slip Stitch
Skp=Skip
St(s)=Stitch(es)
*=Repeat from * as directed in pattern


Blanket:

Foundation: With color A, Ch 4, SlSt in the beginning Ch to form a circle.

Round 1: Ch 3, DC into the center of the circle 11 times. SlSt in top of beginning Ch 3 to join. (12 Sts)

Round 2: Ch 3, Dc into bottom of the same Ch space. 2 DC in each DC around. SlSt in top of beginning Ch 3 to join. (24 Sts)

Round 3: Ch 3, Sc in next St, skip next St, 3 Dc in next, Ch 3, 3 more DC in same space. This creates your first point. *Skip next St, Sc in the next. Skip next, 3 Dc, Ch 3, 3 Dc in next St. Repeat from * 4 more times. SlSt into top of first Sc to join.

Round 4: S1St in the next 2 Sts. Ch 3. DC in next St. (3 DC, Ch 3, 3 DC) in next point space. DC in next 2 Sts. Skp next 3 Sts. DC in next 2 Sts. *(3 DC, Ch 3, 3 DC) in next point space. 2 DC in next 2 Sts, Skip next 3 Sts, DC in next 2 Sts. Repeat from * 3 more times. (3 DC, Ch 3, 3 DC) in next point space. DC in the next 2 Sts. SlSt in top of first Ch 3 to join. End off.

Round 5: Start color B by pulling a loop through the top of the Ch 3 on previous round where SlSt was made. SlSt in the next DC. Ch 3, DC across until the next point space. (3 DC, Ch 3, 3 DC) in point space. DC in the next 4 Sts. *Skp next 2 Sts. DC in next 4 Sts, (3 DC, Ch 3, 3 DC) in point space. DC in next 4 Sts. Repeat from * 4 more times. SlSt in top of beginning Ch 3 to join.

Round 6: SlSt in the next DC. Ch 3, DC across until the next point space. (3 DC, Ch 3, 3 DC) in point space. DC in the next 6 Sts. *Skp next 2 Sts. DC in next 6 Sts, (3 DC, Ch 3, 3 DC) in point space. DC in next 6 Sts. Repeat from * 4 more times. SlSt in top of beginning Ch 3 to join. End off.

Round 7: Start color C by pulling a loop through the top of the Ch 3 on previous round where SlSt was made. SlSt in the next DC. Ch 3, DC across until the next point space. (3 DC, Ch 3, 3 DC) in point space. DC in the next 8 Sts. *Skp next 2 Sts. DC in next 8 Sts, (3 DC, Ch 3, 3 DC) in point space. DC in next 8 Sts. Repeat from * 4 more times. SlSt in top of beginning Ch 3 to join.

Round 8: SlSt in the next DC. Ch 3, DC across until the next point space. (3 DC, Ch 3, 3 DC) in point space. DC in the next 10 Sts. *Skp next 2 Sts. DC in next 10 Sts, (3 DC, Ch 3, 3 DC) in point space. DC in next 10 Sts. Repeat from * 4 more times. SlSt in top of beginning Ch 3 to join. End off.

Round 9: Start color A by pulling a loop through the top of the Ch 3 on previous round where SlSt was made. SlSt in the next DC. Ch 3, DC across until the next point space. (3 DC, Ch 3, 3 DC) in point space. DC in the next 12 Sts. *Skp next 2 Sts. DC in next 12 Sts, (3 DC, Ch 3, 3 DC) in point space. DC in next 12 Sts. Repeat from * 4 more times. SlSt in top of beginning Ch 3 to join.

Round 10: SlSt in the next DC. Ch 3, DC across until the next point space. (3 DC, Ch 3, 3 DC) in point space. DC in the next 14 Sts. *Skp next 2 Sts. DC in next 14 Sts, (3 DC, Ch 3, 3 DC) in point space. DC in next 14 Sts. Repeat from * 4 more times. SlSt in top of beginning Ch 3 to join. End off.

Round 11: Start color B by pulling a loop through the top of the Ch 3 on previous round where SlSt was made. SlSt in the next DC. Ch 3, DC across until the next point space. (3 DC, Ch 3, 3 DC) in point space. DC in the next 16 Sts. *Skp next 2 Sts. DC in next 16 Sts, (3 DC, Ch 3, 3 DC) in point space. DC in next 16 Sts. Repeat from * 4 more times. SlSt in top of beginning Ch 3 to join.

Round 12: SlSt in the next DC. Ch 3, DC across until the next point space. (3 DC, Ch 3, 3 DC) in point space. DC in the next 18 Sts. *Skp next 2 Sts. DC in next 18 Sts, (3 DC, Ch 3, 3 DC) in point space. DC in next 18 Sts. Repeat from * 4 more times. SlSt in top of beginning Ch 3 to join. End off.

Round 13: Start color C by pulling a loop through the top of the Ch 3 on previous round where SlSt was made. SlSt in the next DC. Ch 3, DC across until the next point space. (3 DC, Ch 3, 3 DC) in point space. DC in the next 20 Sts. *Skp next 2 Sts. DC in next 20 Sts, (3 DC, Ch 3, 3 DC) in point space. DC in next 20 Sts. Repeat from * 4 more times. SlSt in top of beginning Ch 3 to join.

Round 14: Ch 1, Reverse single crochet around, putting 3 reverse Sc in each point space. SlSt in beginning Ch 1 to join. End off. Weave in all ends.


Bunny:
(Head)

Foundation: With white, Ch 4, SlSt in beginning Ch to form a circle.

Round 1: Ch 2, 11 HDC in the center of the circle. SlSt in the top of beginning Ch 2 to join.

Round 2: Ch 2, 2 HDC in each St around. SlSt in top of beginning Ch 2 to join.

Round 3: Ch 2. *HDC in the next St, 2 HDC in the next. Repeat from * around. SlSt in the top of beginning Ch 2 to join.

Rounds 4-9: Ch 2, HDC in each St around. SlSt in the top of beginning Ch 2 to join.

Round 10: Ch 2. *HDC Dec over next 2 Sts, 1 HDC in the next. Repeat from * around. SlSt in the top of beginning Ch 2 to join.

Round 11: Ch 2, HDC Dec in each St around. SlSt in the top of beginning Ch 2 to join.

*Before working Round 12, you'll need to embroider the eyes, nose and mouth onto the face of your bunny head using small amounts of black and pink. Once face is complete, begin to lightly stuff bunny head (not full).

Round 12: Ch 2, HDC in each St around. SlSt in top of beginning Ch 2 to join. End off leaving a long tail for sewing.  Finish stuffing head.


(Ears)

Inner(Make 2): With Pink, Ch 13, HDC in second Ch from the hook, and in each remaining Ch across. End off and weave in ends.

Outer(Make 2):
Foundation: With White, Ch 13, HDC in second Ch from the hook, and in each remaining Ch across. Ch 3, turn.

Round 1: DC in the next 10 Sts. 3 DC in the next. Working on opposite side of the foundation Ch, 2 DC in the next St. DC in the last 11 Sts. End off leaving a tail for sewing.


Completing The Lovey

To complete the lovey blanket you will need to sew all of your parts together. Begin by sewing the inner part of the ears to the center front of the outer part of the ears. Then you will have to sew the ears to the top of the bunny head, making sure that the front pink side of the ears is facing the same direction as the face of your bunny. Then you will have to attach the bunny head to the center of the star blanket. Sew it securely so that it won't come apart later. Lastly make sure to weave in and hide any remaining yarn ends.

*Optional: Cut a small amount of ribbon to match your blanket and make a bow around the bottom of the bunny head where it meets the blanket.

***Terms of use: You may do whatever you wish with the finished product made from this pattern. If you do plan to sell the item, I ask that you give credit to where you got the pattern from. You can NOT claim the pattern as your own. You may NOT sell the pattern itself.

Monday, October 1, 2012

Crochet Pink Ribbons for Breast Cancer Awareness


October is Breast Cancer Awareness month. I came up with these crocheted pink ribbons in honor of those who have lost, won, or are still currently fighting in the battle against cancer. I personally know many of those who have fought the battle.

The pattern for this ribbon will be posted for FREE here on my blog. I will be posting that either tonight or sometime tomorrow. The pattern is very simple, uses up a small scrap amount of yarn, and takes only a few minutes to make. I came up with 2 different ways to display your support for the cause. The first ribbon in the picture above is displayed as a key ring. Proudly display your support right from your key chain. The second ribbon in the picture is being displayed as a pin. Pin the ribbon to your shirt, jacket, scarf, hat or wherever you would like to show your support wherever you go! What do you all think?

Keep a look out for the pattern. It will be up soon! :)

Crochet Pink Ribbon Pin (Front)

Crochet Pink Ribbon Pin (Back)

Crochet Pink Ribbon Key Ring


Friday, September 28, 2012

Seasonal Projects

Anyone working on projects for the coming seasons? I have a few ideas for things to make for Autumn/Fall, Halloween and even Christmas/Winter. I would love to work on some gifts for friends and family to give for Christmas. I'm just not sure how much time I will really have to work on my crochet things when the new babies come. I'm sure I will make time. I will be up several times a night to feed, i'm sure I can BF and crochet at the same time! :) I have a few short updates to post here soon. A little about crochet and a little about my family and the coming new additions.
In the meantime I would love to hear about what you are all working on. Feel free to share pics! Anyone have any patterns they would like for me to try out and review for you? I haven't done any reviews in a while. I love to try new patterns and stitches so I am up for anything! :)

Monday, August 27, 2012

Covered Travel Baby Wipes Cases


Ok, so this is not crochet related, but it is family related lol. I like to be creative, and anything DIY excites me. I have decided to make a couple of covered baby wipes travel cases for my twins. They come in handy for the older boys too, sometimes. I was amazed at how easy they were to make. It definitely looks a lot harder than it is. So many people that I have shown thought I bought them, or sewed them. I think it's funny and take it as a compliment. I have only made 2 of these so far, but I am thinking of making a 3rd and making a video to show how I do it. 

I used the Huggies brand travel baby wipes containers that I purchased from Walmart for just over a $1 a piece. I also used cotton fat quarters for the fabric, and have plenty left over. Purchased them from Walmart as well for $ .97 a piece. I used a soft flannel under the cotton as batting because it was cheaper and worked  just as well. I got it at Walmart on clearance for $ .32. Lastly I purchased some ribbon to match with my fabrics and nursery theme. They cost just over a dollar each. So for about $5 a piece you can make these cases. 

We are doing a baby animal/jungle theme for our twins so I made one with jungle leaves print, and one with giraffe print. They came out so cute! I am thinking of covering a couple of the larger wipes cases as well. These are much more fun than the boring white ones! :)


Friday, August 3, 2012

Crochet Ribbed Baby Hats


So these are fresh off my hook! 2 absolutely adorable baby hats I crocheted for my twins! I made these hats following a tutorial on YouTube by yolandasotolopez. It is a crochet ribbed stitch hat. It was super easy to follow her tutorial and the hat worked up very quickly. I made them both in the same day. What I like most about these little hats is that they are very thick and will be nice and warm! My babies will be born toward the colder months where I live and so thick, warm hats will be perfect for them! The only thing I changed about her pattern was that I added a single crochet stitch along the bottom just for a nice finished edge. I am adding these to the hospital bag so that they can wear them after they are born! :) I made these with RedHeart Super Saver yarn and I just love how they turned out. Can't wait to put them on the twins!

RedHeart - Light Blue

RedHeart - Honeydew


Tuesday, July 31, 2012

Newest Pattern! - Sleepy Bunny Lovey


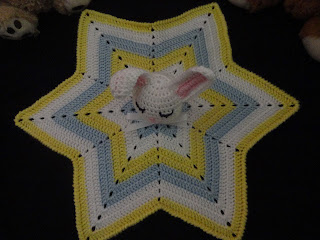
I would like to introduce my newest pattern, Sleepy Bunny Lovey! This is a combination of a small baby starghan lovey and an amigurumi bunny. I created this pattern with basic stitches so that it would be easy for anyone to follow. I am very happy with how it turned out. I think it is absolutely adorable! I made this cute little baby bunny blankie with Caron Simply Soft brand yarn. It can be made with any soft 4-ply yarn. It is very cuddly and would be perfect for any new addition. (I'll have to make a couple for my little jelly beans due in November :) ) This pattern will soon be available for purchase. You can find it listed in my "Patterns for Sale" section on this blog. If you are interested in getting this pattern sooner, you can head on over to my Facebook page (https://www.facebook.com/pages/CrochetCrazyMama-Blog/196370060448021) and enter in the giveaway for a chance to be one of two winners of the pattern for free! :)

Here are a few more pics of this adorable bunny lovey! (Sorry I'm no photographer :/)


Sleepy Bunny Lovey - Video

Check out my video for another look at my newest pattern!


Friday, July 27, 2012

New Hair Cut!

My brother (professional) cut my hair for me and I am loving it! I needed a change. Sometimes you just get sick of the same old thing. This shorter style will be easier to manage when I have 4 kids to lug around all day. What do you ladies and gents think? :)


22 Weeks 5 Days pregnant with twins showing off my new hair cut and growing belly! :)


Crochet Humor

Here is just a little crochet humor I thought I would share! :) Hope you enjoy!


Wednesday, July 25, 2012

Gifts for the TWINS :)


Here are a couple of crocheted baby blankets that my mother made for my twins due in November. She only recently learned to crochet and she is a fast learner! :) The blankets are adorable. There was no pattern for these, she just made them up herself. Pretty good for a newbie huh? Thanks mom! <3

Yellow Striped Baby Blanket

Green Striped Baby Blanket


Tuesday, July 24, 2012

Crochet Lovey/Security Blankets


I crocheted these 2 Lovey/Security blankets as baby shower gifts. They are made with Caron Simply Soft yarn and a size H crochet hook. The first one is a frog, and the second one is a bear. This is a modified pattern. The original pattern I purchased from Anniesattic.com. The pattern is called Zoo-curity Blankets.


Friday, July 20, 2012

They're a...


So here is another little update on the twins. For those of you who don't already know we had our anatomy ultrasound scan a couple weeks ago. It's where they measure every bone and organ in the babies bodies. They also have a chance to find out the gender. The ultrasound went very well, the only upsetting thing I found out was that both babies are in the breech position. The Dr. said they still have plenty of time to turn around though. I really hope they do because I would like to experience a birth as natural as possible. Breech babies almost guarantee a C-section. So I'm keeping my fingers crossed!  The Babies are getting so big. They are actually bigger than the average sized baby at their gestational age. It's a very good thing being that they are twins and they will be more than likely born early and will be very small. We got quite a few pictures printed from the ultrasound. We had planned on recording it but we were told it was not allowed. I became pretty upset at finding that out. I had not brought my boys with me to the appointment but told them we were recording it and that they would be able to watch it later. I feel like I let them down. :( At least they got a lot of pictures to look at.

So the big news, the tech asked us if we wanted to know the genders of the twins. We said yes! We had been waiting for weeks to know what we were having. I was hopeful to finally have a little girl. We were already told the babies are fraternal. Which means they could possibly be two different genders. The tech looked at Baby A first. When I saw it I knew what it was immediately. I already have two boys and am very used to what that looks like on an ultrasound. Baby A is a boy!! :) She looked at Baby B next. It was a little more difficult to see and the tech thought we might not find out at first. Finally she angled the Doppler just right and we saw what looked like more boy parts! Baby B is a boy!! So looks like I'm going to be a mommy of 4 boys. No little girls for me. I admit that was a little disappointing, but I love them either way and I am excited and looking forward to meeting them.

I told my BIG boys that they have 2 little brothers on the way and Rylan was a little upset that he wasn't getting a little sister, but he still seems excited about the babies coming. Elijah is a little less into anything going on right now. He didn't seem as phased by the news. I'm sure they are both going to make excellent big brothers and helpers when the twins are born. Justin, my husband, went in expecting to hear that it was two more boys for us, so he wasn't very surprised to hear it.

I am now almost 22 weeks along. Both babies are very healthy and I am too. :) I'm half way there already yay! I'll stick in a few of the photos at the end! They are soo adorable!

Here I am at 18 Weeks! :)

Profile of Baby A

Profile of Baby B

My little boys waving hello! :)

Friday, June 22, 2012

Elijah is 3 years old!


So yesterday, June 21, was my youngest son's 3rd birthday. I still can't believe he is 3 already, it just blows my mind. Time seems to be going by so fast. I wish I had the power to just slow it all down a bit. He is getting so big and is so smart. I'm amazed at how much they change in such a short amount of time. I love to watch them grow and learn every day, but it's so sad at the same time. I just wish they could stay this little forever.
We are having Eli's birthday party this weekend. It will be a Go Diego Go and Dora the Explorer themed party. He is currently obsessed with them. We are just having a small get together with close family, a cookout and some water fun! Hopefully the weather stays as nice as it's been and allows it to go smoothly. Can't wait to cool off in the pool! I just gotta squeeze this twin baby belly into a bathing suit lol!

Happy 3rd Birthday baby boy!! :)

Wednesday, June 20, 2012

Quick Update on the TWINS!! :)

On Monday, June 18, we had a little scare with the twins. The scare actually began in the days before. I had noticed I had stopped feeling movement from Baby B on my right side. Baby B had been the most active of the twins since the beginning of the pregnancy when I first started to feel them. So it was definitely making me worry a bit when I stopped feeling any movement. On Monday I started getting sharp pains in my lower abs and then had spotting that night. I decided to wait to go to the Dr.'s until my appointment the next day, although I was completely freaking out!
On Tuesday, June 19, I went in for my scheduled appointment. They switched me to a different Dr. for the third time this pregnancy. I am now seeing a Dr. for high risk pregnancies. He's supposed to be the best in the area though, and at this point I just really don't care who my Dr. is anymore. I just want 2 healthy babies.  After explaining the lack of movement, pains, and spotting from the night before, the Dr. decided they should do a quick ultrasound scan to check on the twins. I was so nervous. I kept thinking the worst. They brought me into another room with a smaller ultrasound machine. They started the ultrasound and I stared at the screen nervously. He went straight to Baby B first who was the twin I was most concerned with. Baby A had been moving just fine. As the doppler moved over Baby B, I saw his/her little heart beating away and I felt a sigh of relief. It was still alive! He/She kept squirming around although I couldn't feel any of it. The Dr. looked over both babies. Baby B is breech on the right of my uterus and Baby A is currently head down on the left. Oh yeah, one more thing, we know for sure that they are fraternal twins. They have 2 separate placentas formed from 2 separate eggs. Yay! We were concerned that with identical twins that even more problems would arise. Both babies he said were fine. He said he wants to see me again in 2 weeks and I will also be having my anatomy scan the same day but before my appointment. So we'll know the genders of my little jelly beans soon enough! So excited!! :) I was just glad to know that they were both healthy and active and doing great so far. I'll keep you all updated! :)

Quick pic of the Twins at 17 Weeks
Baby B on the left and Baby A's head on the right.

Saturday, May 26, 2012

Getting back to crochet!

So I know that I have been VERY inactive both here and on Facebook in the last month or so, but you all know why that is by now. I am feeling much better these days and have recently picked up the hook again. I am currently working on a baby blanket for one of my little jelly beans. I still have to make a second one for the second twin! :) I do have some older stuff I have made or that I was working on before the baby stuff came about and I will be sharing some of that stuff with you. I just have not felt like crocheting anything the last month or so... I just did not have the energy to even try to work on anything. It didn't stop me from thinking of new things to make though. I am happy to be back to crochet again, and I am excited to share my new ideas and projects with you! Thank you all for hanging in there and waiting for my return, it means a lot! I'm back! :)

Thursday, May 24, 2012

I have some news!! :)

So most of you know by now that I am expecting again. It has been hard on me during the first trimester, but I am definitely starting to feel much better now. I am thinking of starting a blog just for the pregnancy stuff, but I am not sure. I might just post things randomly here. This is "Crochet Crazy Mama" after all! :) Well I had my very first appointment on May 10th. I was 11 weeks pregnant. The appointment seemed like it went on forever as I filled out a stack of papers and forms and signed my name at least a thousand times lol. She determined my due date was around November 25th 2012. They weighed me, and I have only gained 2 pounds so far. She said that was really good. She checked my blood pressure and that was great too. My urine test came back saying I was leaking glucose, which I guess means I could possibly have gestational diabetes. :( She is going to test me again later I guess. They did the exam down below and she said everything seemed fine. Just as she was about to finish the exam, I asked if I would be able to hear the heartbeat. She said we could try because i was 11 weeks. She placed the doppler on my belly and moved it around and within seconds I could hear it beating away. I wanted to cry. She said she was shocked that they found it because usually the baby is down pretty low at this point. I was happy she did though. She said it was 166 beats per minute which was really good. Then the appointment was over. She gave me orders for an ultrasound to have done as soon as possible. So I checked out and they set up the ultrasound for the next day. I was so excited!

So on May 11th, I went in for my scheduled ultrasound appointment. I didn't have to wait very long before I was called in. My husband Justin, and my 2 boys came in the room with me. I was surprised to see they had enough seats for everyone. I got comfortable on the exam bed and the ultrasound tech proceeded to put the ultrasound gel on my stomach. I was lucky to get the warmed up kind. The cold kind really sucks. My eyes went directly to the monitor with the anticipation of seeing my beautiful little jelly bean. She placed the doppler on my belly and an image immediately popped up on the monitor. For a second I just stared in amazement. I was sure I was seeing double. The tech was messing with some buttons before looking up to the monitor herself. Then she said something I'll never forget, "Oh look! Two babies!" My mouth popped open and I was just shocked. I was in fact seeing double. There were not just one but two little jelly beans in there. I looked to my husband and just said "Ooh myy goodd". lol. He looked shocked to. Although I had been kind of suspecting there was more than one baby in there, the appointment I had the day before had confirmed there was only one. I mean I had only heard one heartbeat. So I was still pretty shocked to find out that there were in fact two! We are sooo excited, my boys included! This journey is going to be a tough one, but god has definitely blessed me in many ways, and I am looking forward to everything that comes along with it. <3

Here is a pic of Baby A.

Seeing double?! Here is a pic of Baby B (On the left), and part of Baby A (On the right).


Friday, April 13, 2012

So, where have I been?

Hello everyone! I have to apologize for my lack of progress on the blog. I haven't been feeling great. I have been very tired and feeling a lack of energy to do much at all. It's all due to the fact that my husband and I are expecting our 3rd child this Fall. So, yay!! :D I hope I will be feeling better soon and can get back to my projects soon and sharing them with you all!

Tuesday, March 13, 2012

Crystalites Crochet Hooks by Susan Bates (Review)


I just recently purchased a set of these Crystalites crochet hooks by Susan Bates from shopredheart.com. I was ordering some new yarn anyway and decided to grab these just to try something new. They only cost a few dollars. I had never used a plastic hooks before. I mostly use the aluminum ones.

There were things I liked about these hooks and things I didn't really like. One of the things I did like, was that each hook is a different translucent color. I have already memorized which color is which sized hook. I also liked that these hooks came with a clear plastic case with the sizes of each hook printed on the outside. So very easy to store and find the hook you are looking for. Something I didn't like about these, is that in the description it stated that the head of these hooks is designed to reduce wrist fatigue. I didn't get that effect when I used them. My wrist seems to tire just as fast as they do with my aluminum hooks. Another thing I didn't like about these hooks, was that my yarn did not smoothly run across the surface of them. It would almost catch on them at times and it actually got a little annoying. I only tried them with 100% acrylic yarn. I'm not sure if using a different yarn I might have had a different experience with that. One thing about these that I noticed is that they are slightly shorter than the aluminum hooks and even the bamboo hooks that I am used to. I had to adust the way I held my hooks. 

Overall I would rate these hooks a 3 out of 5. I will most likely continue to use my aluminum and bamboo hooks more than these. I think I will try to use a different yarn type with them just to see if they work any better with it. If I do that i may post an update about that. If any of you have used these and had better luck with different yarn types let me know. If anyone is interested in purchasing these hooks I found mine on shopredheart.com for around $7. Happy Crocheting!

Sunday, March 11, 2012

Crochet Toilet Paper Cover


This is a crocheted toilet paper cover that I made for a request. She requested that it be made with a lighter purple color and that she did not have a preference for a specific kind of flower. Her bathroom theme is white and purple, so I went with a white flower. I decided to create a new type of flower just for this cover. I really really like it a lot. I cascaded the flowers across the top and down one side of the cover. I embroidered yellow centers onto the flower to add a touch of color. I added little green crochet spirals to bring out the colors of the whole thing. I thought it came out really pretty. She loved it too!

Here is a close up of the flowers I designed for this cover.

Side view of the cover.


Thursday, March 1, 2012

Puff Stitch Hat


This is my completed crochet puff stitch hat. This hat pattern in by Teresa Richardson (The Crochet Geek on YouTube). I love this hat. It was very easy to make and I followed right along with the video tutorial. I was actually unfamiliar with the puff stitch before making this hat. I really like it though and it was easy for me to learn. Teresa is a great teacher. I am already thinking of a few patterns of my own that I can incorporate this stitch into. The flower in the picture is actually one of my own patterns. It is posted here on the blog: http://crochetcrazymama.blogspot.com/2011/05/spring-bloom-pattern.html. I thought adding the flower made the hat even better. There are many ways you could accessorize a hat like this one. This was another awesome pattern by Teresa!